How to add an expense
Tracking your spending is the core of Trav. You can add expenses even when you are offline!
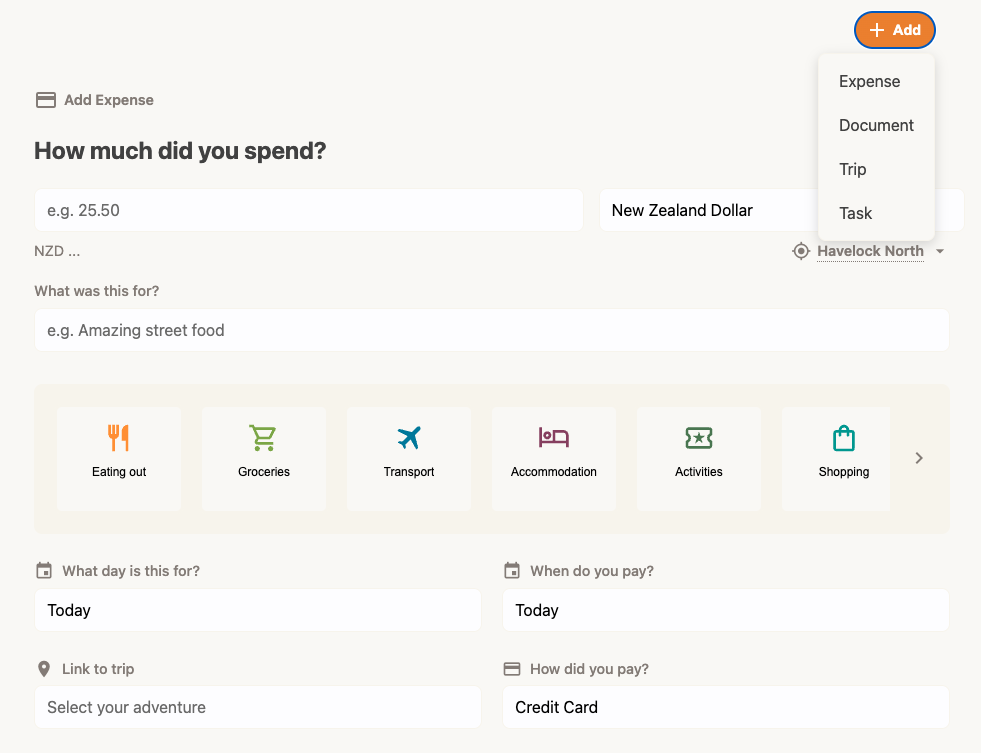
- Open the expense form: Tap the + Add button at the top right of the app and select select Expense.
- Enter the Amount: Type in how much you spent.
- Check the Currency: We automatically detect the local currency based on your location, but you can change it manually if needed.
- Add Details:
- Location: We try to auto-fill this, but you can type a city name to search.
- Category: Select what you spent money on (e.g., Eating Out, Transport). You can add a custom category if needed.
- Date: Defaults to "Today," but you can tap to select any date - and if you're a Trav Plus subscriber, you also have the options to split the cost over a date range, or spread it over your entire trip (eg vaccination costs).
- Trip: (Trav Plus) Linking an expense to a trip is a great way to get more insights on your spending. We link the expense to the trip automatically - if you add it during a trip that's in progress.
- Payment Method: (Trav Plus) Record how you paid, and set custom payment methods if needed to help you better plan for your next trip.
- Payment Date: (Trav Plus) Track when you need to pay to help keep on top of upcoming expenses.
- Tap Add Expense: You're done!
Tip: If you are a Trav Plus member, you can link the expense to a specific Trip, choose a Payment Method, and set a specific Payment Date.